How to fix a shingle roof leak
A practical San Marino guide to finding the entry point and patching an asphalt shingle roof leak, plus when a repair job needs a professional crew.
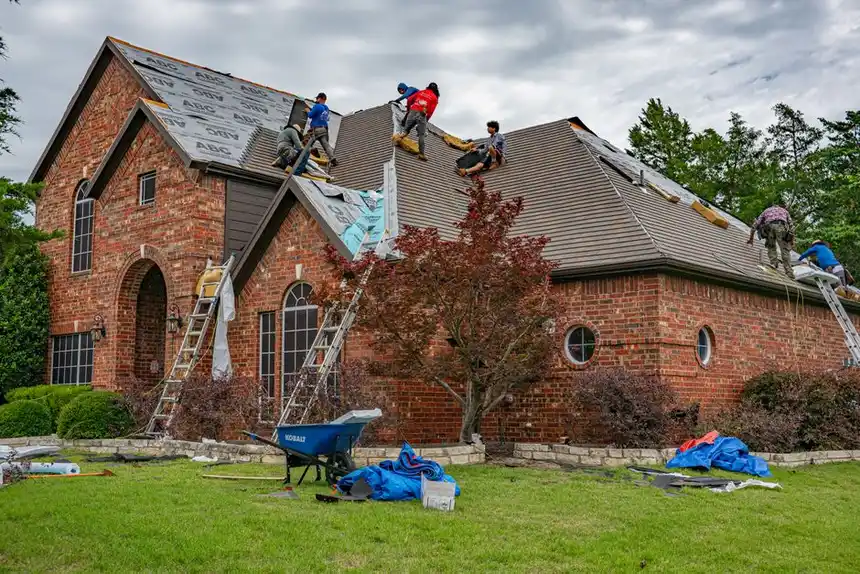
You fix a shingle roof leak by finding the true entry point above the stain, lifting the damaged shingle course, and sealing the underlayment and fastener line before you re-nail anything. That is the whole job in one sentence: locate, expose, seal, re-lay. Everything below is the detail that keeps the patch from failing after the next hard rain in San Marino.
We have patched hundreds of asphalt roofs across Bexar County, and the pattern is always the same. Water enters high, travels down the deck, and drips out somewhere else. If you chase the drip instead of the source, you will be back on the roof in three weeks. Here is how we do it, and how you can do it yourself if the damage is small.
What causes shingle roof leaks in San Marino
Shingle roof leaks in San Marino almost always start at a penetration or a seam, not in the middle of a field of shingles. Our climate does the rest. Summer attic temperatures here hit 140 to 150 degrees Fahrenheit, and that heat cooks the asphalt mat until it turns brittle. Then a 40 mph spring gust lifts a tab, and the next storm drives water sideways under it.
The four causes we see most often:
- Failed pipe boots. The rubber collar around a plumbing vent cracks after 8 to 12 years of UV exposure. That is the single most common leak source on a Texas shingle roof.
- Exposed or lifted fasteners. Nails that back out during thermal expansion leave a pinhole that leaks a cup of water per storm.
- Flashing failures. Step flashing at a wall, chimney flashing, or valley metal pulls away from the shingle and opens a channel.
- Granule loss and brittle tabs. When you can see the black asphalt mat showing through, the shingle is done. It will crack instead of flex.
Hail matters too. A 1-inch hailstone at 70 mph can bruise the mat without tearing the surface, and that bruise becomes a crack two summers later. If your roof took hail in the last few seasons, that is worth knowing before you start patching.
How do I find the actual leak entry point?
You find the entry point by working uphill from the interior stain, not by standing on the drip. Water follows the deck, so the source is usually 4 to 10 feet above and up-slope of where it shows up inside. Start at the ceiling stain, go straight up through the attic, and mark the spot on the underside of the roof deck.
From there, here is the sequence that works:
- In the attic, look for dark streaks, rusted nail tips, or black staining on the sheathing. That streak points uphill to the entry.
- On the roof, inspect every penetration within 10 feet up-slope: vent pipes, chimney, skylights, satellite mounts.
- Check the valleys. Water concentrates there, and a 1/8-inch gap in valley metal will leak steadily.
- Look at the flashing at sidewalls and headwalls. If you can slide a putty knife under it, water can get under it too.
If you cannot pin it down from the ground or the attic, a professional Roof Leak Detection in San Marino, Texas visit uses moisture meters and a hose test to map the path in under an hour. That is cheaper than replacing three squares of shingles you did not need to touch.
Tools and materials for a shingle roof leak patch
A proper shingle roof leak patch in San Marino needs about $60 to $120 in materials and two to three hours of your Saturday. You do not need a full tear-off for a localized leak. You need the right sealant and a matching shingle.
- Replacement three-tab or architectural shingles that match your existing color and profile
- Roofing cement (asphalt plastic cement), one quart
- 9-inch and 6-inch roofing trowels
- Galvanized roofing nails, 1-1/4 inch, with neoprene washers if you are nailing into a repair
- Pry bar, flat bar, and a utility knife with fresh blades
- Self-adhering flashing tape for valleys and penetrations
- Safety harness, roof boots with grip, and a helper
Buy the shingles from a local supplier and bring a photo of your roof. Architectural shingles from 2005 and architectural shingles from 2026 do not match, and a mismatched patch is the first thing a buyer notices. If you would rather not source materials or climb the roof, our Shingle Roof Leak Repair in San Marino, Texas crew carries matching stock on every truck.
Step-by-step: how to repair a shingle roof leak
Once you have the entry point marked, the repair itself is straightforward. Work on a dry day with no rain in the forecast for 24 hours, and never walk a shingle roof above 90 degrees Fahrenheit - the granules will scuff and the mat will soften under your boots.
Step 1: Lift the shingle course above the damage
Slide a flat bar under the shingle tabs two courses above the leak and gently break the seal strip. Do not force it. If the shingle cracks, it was already brittle and needs replacement anyway.
Step 2: Remove the damaged shingle
Pull the nails with a pry bar, then slide the damaged shingle out from under the course above it. Cut a replacement shingle 1/4 inch narrower than the gap so it seats without buckling.
Step 3: Seal the underlayment and deck
This is the step most homeowners skip, and it is the one that matters. Spread roofing cement over the exposed underlayment and any nail holes in the deck. If the sheathing is soft or crumbly, you have rot, and that is a Roof Sheathing Repair in San Marino, Texas job, not a patch.
Step 4: Set the new shingle and nail it high
Slide the replacement into place and nail it 1 inch above the seal strip, 1 inch in from each edge. Four nails per shingle. Then cover each nail head with a dab of roofing cement.
Step 5: Re-seal and test
Press the course above back down and seal the seam with a 3/8-inch bead of cement. Wait 24 hours, then run a hose on the roof for 10 minutes directly above the repair and watch the attic. If it stays dry, you are done.
Common mistakes that make shingle leaks worse
The most damaging mistake is sealing the leak from inside the attic. That traps water in the deck, and trapped water rots sheathing and framing. We have pulled apart roofs where a homeowner had smeared three tubes of caulk on the underside of the deck, and the rot had spread 6 feet in both directions.
Other mistakes we see on San Antonio-area roofs:
- Using the wrong sealant. Silicone caulk does not bond to asphalt. It peels within a season. Use asphalt-based roofing cement only.
- Nailing low. Nails driven through the seal strip or the exposed tab will back out and leak. Nail above the seal strip, always.
- Patching over wet decking. If the wood is damp, the cement will not adhere. Dry it first or replace it.
- Ignoring the second leak. If one pipe boot failed at 10 years, the other three on the roof are on the same clock.
- Walking a hot roof. Above 90 degrees, you will damage shingles you did not come to fix.
One more: do not patch a roof that has more than 20 percent granule loss or more than three leaks in different areas. At that point you are buying time, not fixing a problem.
When to call a professional
Call a professional when the leak is at a valley, a chimney, or a skylight, when the deck is soft, or when you cannot find the entry point after two attempts. Those four situations account for most of the calls we run. Flashing work requires weaving metal into the shingle courses, and getting it wrong channels water straight into the wall.
We also get called when the roof is steep, when it is over two stories, or when the homeowner simply does not want to be up there. That is fine. Our team handles Roof Flashing Repair in San Marino, Texas and full leak diagnosis with the same visit, and we tell you what we found before we start work. If the roof is at the end of its life, we will say so instead of selling you a patch that fails in six months.
For active leaks during a storm, we run Emergency Roof Leak Repair in San Marino, Texas to stop the water and prevent ceiling damage, then schedule the permanent repair once the weather clears.
Frequently Asked Questions
How do I fix a shingle roof leak in San Marino Texas?
Find the entry point above the interior stain, lift the shingle course, seal the underlayment and nail holes with roofing cement, then set a matching replacement shingle and nail it above the seal strip. Test with a hose after 24 hours. Most small patches take two to three hours.
Can I repair a shingle roof leak myself in San Marino?
Yes, if the leak is at a single shingle or a nail hole and your roof pitch is walkable. Do not DIY a valley, chimney, or skylight leak, and stay off the roof if the deck feels soft. Those repairs need flashing work and a harness.
How much does shingle roof leak repair cost in San Marino TX?
Typical 2026 pricing in this area runs $350 to $650 for a single-point shingle repair, $700 to $1,400 for flashing or valley work, and $150 to $400 for a pipe boot replacement. Emergency after-hours calls add $150 to $300.
What causes shingle roof leaks in San Marino?
Cracked pipe boots, exposed nails, failed flashing, and brittle shingles from 140-degree attic heat are the top four causes. Hail bruising from past storms also opens leaks two to three summers later. Most leaks start at a penetration, not mid-field.
How long does a shingle roof leak patch last?
A correctly installed patch with matching shingles and asphalt cement lasts 5 to 10 years. A patch sealed with silicone or applied over wet decking often fails within one season. If the surrounding shingles are brittle, the patch will outlive them.
Get help with Roof Leak Repair in San Marino
If you have traced the leak and it points to flashing, a valley, or soft decking, we can take it from here. Roof Leak repairer San Antonio serves San Marino and the surrounding Bexar County area with same-day diagnosis and upfront pricing on every repair.
Call 2109395773 and we will get a technician on your roof, find the source, and stop the water before it reaches your ceiling.